A dryer that takes two cycles to dry one load is not “just getting old.” Most of the time, the problem sits behind it: a crushed, loose, or clogged duct hose.
Dryer duct hose installation looks simple, but small errors cause real trouble. A kinked hose traps lint. A loose joint leaks hot, damp air into your laundry room. In the worst case, built-up lint becomes a fire risk.
The good news is that you can do this job yourself in under an hour. You need basic tools, a correctly sized hose, and a little patience.
This guide walks you through every step. You will learn what to buy, how to measure, how to connect each end, and which mistakes to skip. You will also see when it makes sense to call a professional.
Why Proper Dryer Vent Hose Installation Matters
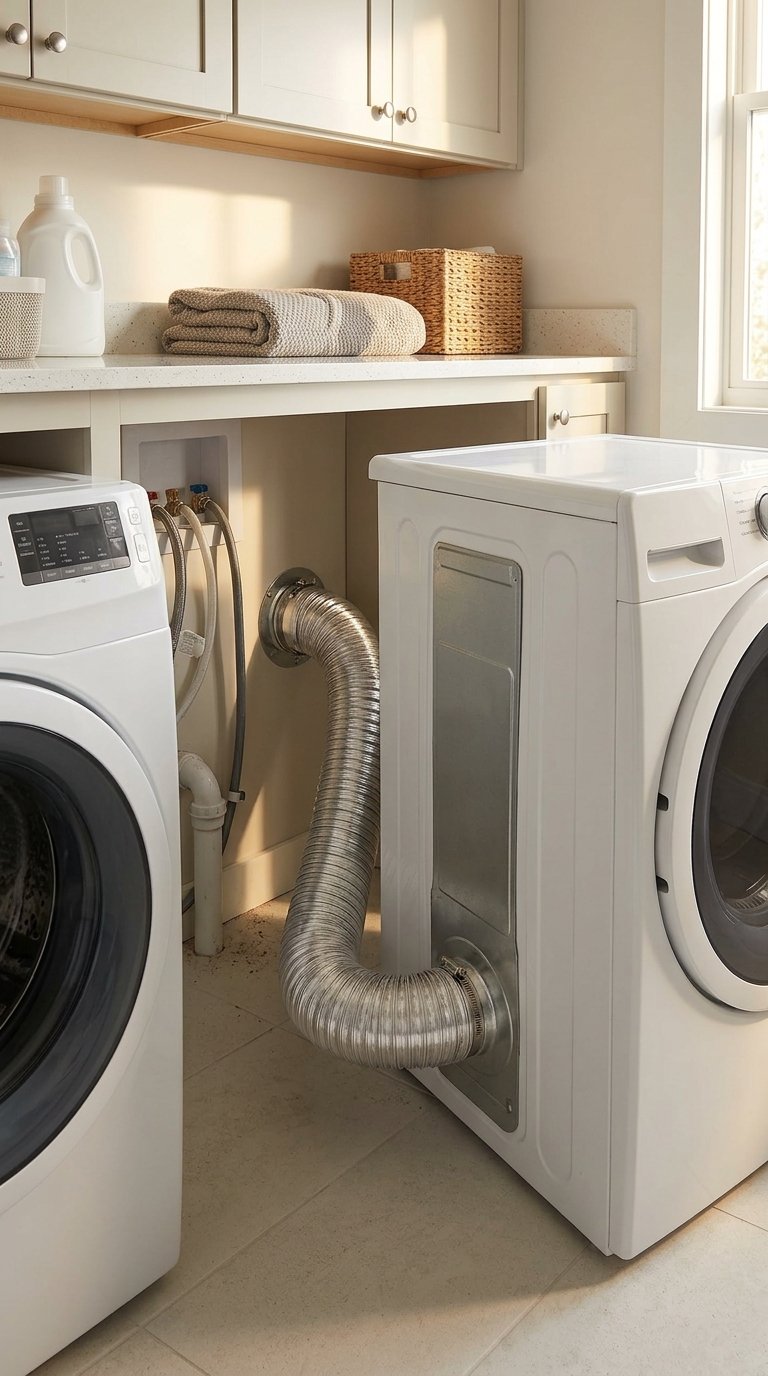
Your dryer pushes hot, moist, lint-filled air out of your home through the vent system. The duct hose is the first link in that chain. If it fails, everything after it works harder or stops working.
Here is what a correct installation gives you:
- Fire safety. According to the U.S. Fire Administration, failure to clean dryers is the leading cause of home clothes dryer fires. Lint is dry and burns fast.
- Faster drying. Clear airflow means shorter cycles. Shorter cycles mean lower energy bills.
- Less moisture indoors. A leaky joint dumps humid air into your walls and laundry room. Over time, that invites mold and peeling paint.
- Longer dryer life. A restricted vent makes the heating element and motor run hotter than they should.
- Safer air. For gas dryers, a blocked or disconnected vent can push combustion gases, including carbon monoxide, back into the house.
Think of the vent as your dryer’s exhaust pipe. You would not run a car with a crushed tailpipe. The same logic applies here.
Signs your current hose needs replacing
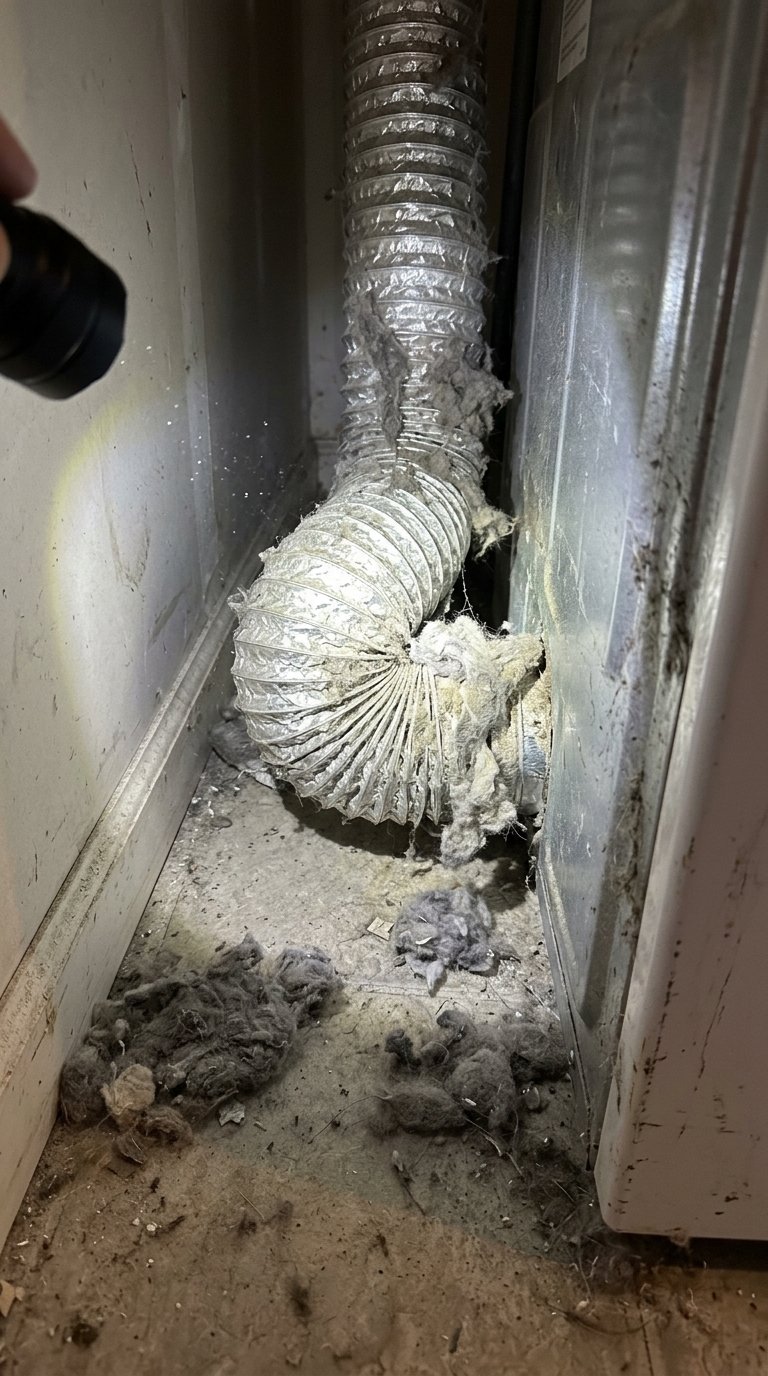
Check for these warning signs before you start:
- Clothes stay damp after a full cycle.
- The dryer or the laundry room feels unusually hot.
- You smell something burnt or musty.
- Lint collects around the dryer or outside vent flap.
- The hose looks crushed, torn, or sagging.
If two or more of these sound familiar, it is time to replace or reinstall the hose.
Tools and Materials You’ll Need to Attach a Dryer Vent Hose
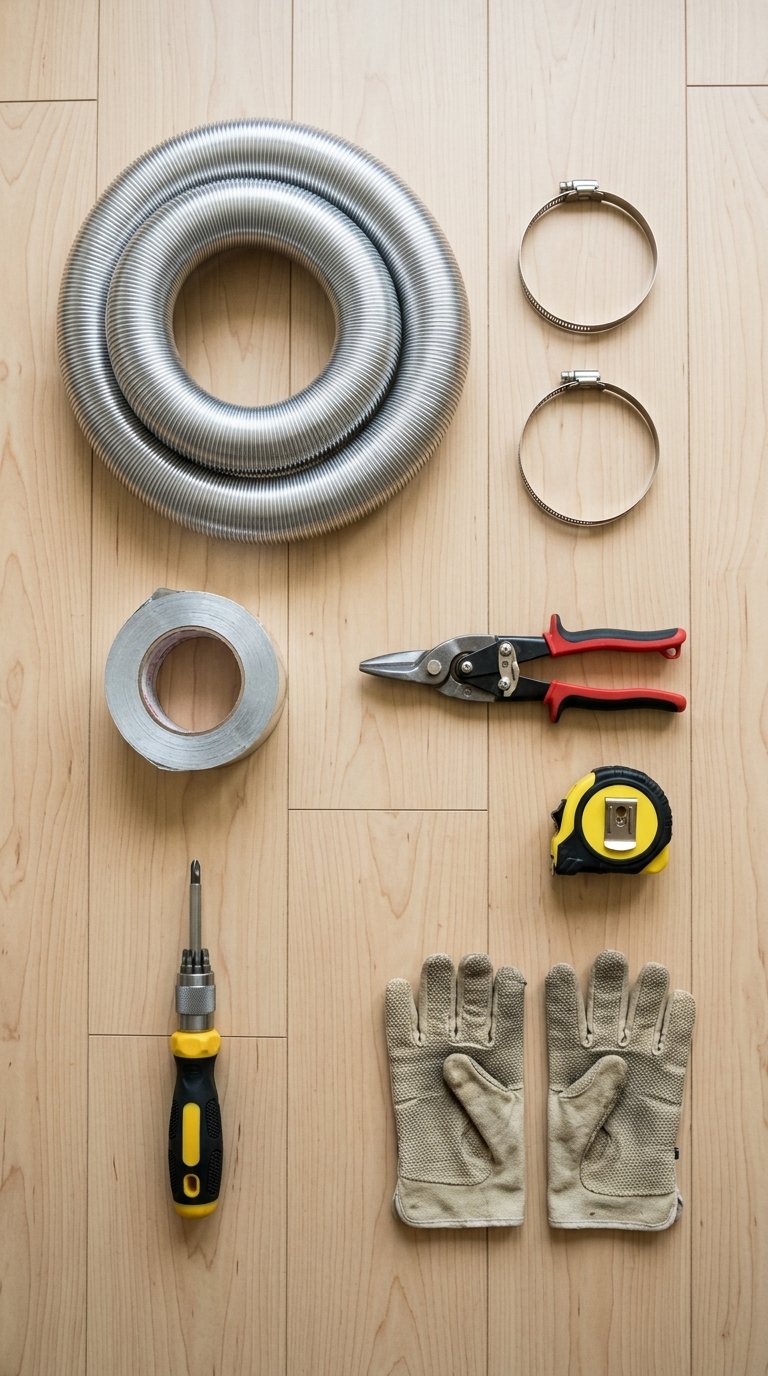
Gather everything before you pull the dryer out. Running to the hardware store with a half-disassembled appliance is no fun.
Tools
- Screwdriver (flathead or Phillips, depending on your clamps)
- Nut driver or small socket set
- Tape measure
- Tin snips or heavy-duty scissors (for cutting foil or metal duct)
- Work gloves (metal duct edges are sharp)
- Flashlight or headlamp
- Vacuum with a hose attachment
- Utility knife
Materials
- Dryer duct hose (4-inch diameter in nearly all U.S. homes)
- Two worm-gear clamps (4-inch, stainless steel preferred)
- Foil duct tape (UL 181 listed, not cloth duct tape)
- Exterior vent hood (only if the old one is damaged)
- Dryer vent elbow or periscope (optional, helps in tight spaces)
Choosing the right hose type
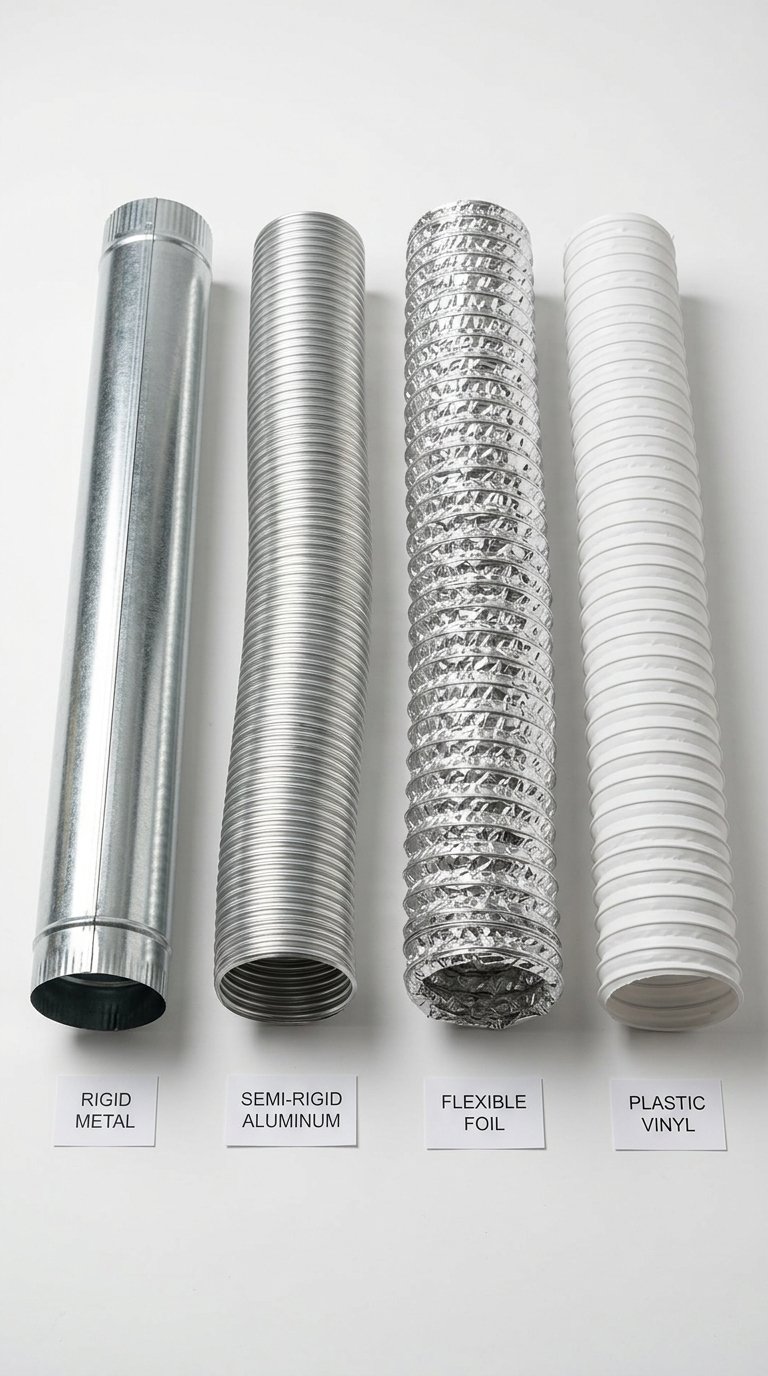
Not every duct hose is equal. The material you choose affects safety, airflow, and how long the job lasts.
| Duct Type | Pros | Cons | Best For |
| Rigid metal | Smoothest airflow, least lint buildup, longest life | Less flexible, harder to fit in tight spots | Wall runs and long distances |
| Semi-rigid (flexible metal) | Easy to bend, holds shape, good airflow | Ridges can catch some lint | Connecting dryer to wall (most homes) |
| Foil (thin flexible) | Cheap, very easy to install | Crushes easily, traps lint, wears out fast | Short, temporary runs only |
| Plastic or vinyl | Very cheap | Not allowed by most codes; can melt or burn | Avoid completely |
Quick tip: For most homes, a semi-rigid aluminum hose between the dryer and the wall is the best balance. Use rigid metal for any run inside the wall.
Always check your dryer’s manual. The manufacturer may name a specific duct type or maximum length.
How long can the duct run be?
Length matters. The longer the run, the harder your dryer must push air.
Under the International Residential Code (IRC), the maximum length of a dryer exhaust duct is generally 35 feet, measured from the dryer connection to the outside. Each 90-degree elbow cuts that allowance by 5 feet, and a 45-degree bend cuts it by about 2.5 feet. Some dryer manuals set shorter limits, and local codes can differ, so confirm both.
| Number of 90° Elbows | Approximate Max Length (IRC default) |
| 0 | 35 ft |
| 1 | 30 ft |
| 2 | 25 ft |
| 3 | 20 ft |
The short flexible “transition” piece between the dryer and the wall duct should stay as short as possible. Many codes cap it at 8 feet, and it must be a listed, metal type.
How to Attach a Vent Hose to a Dryer: Step-by-Step Instructions
Set aside 30 to 60 minutes. Work slowly, and do not force the dryer or the hose into position.
Step 1: Unplug and Move the Dryer
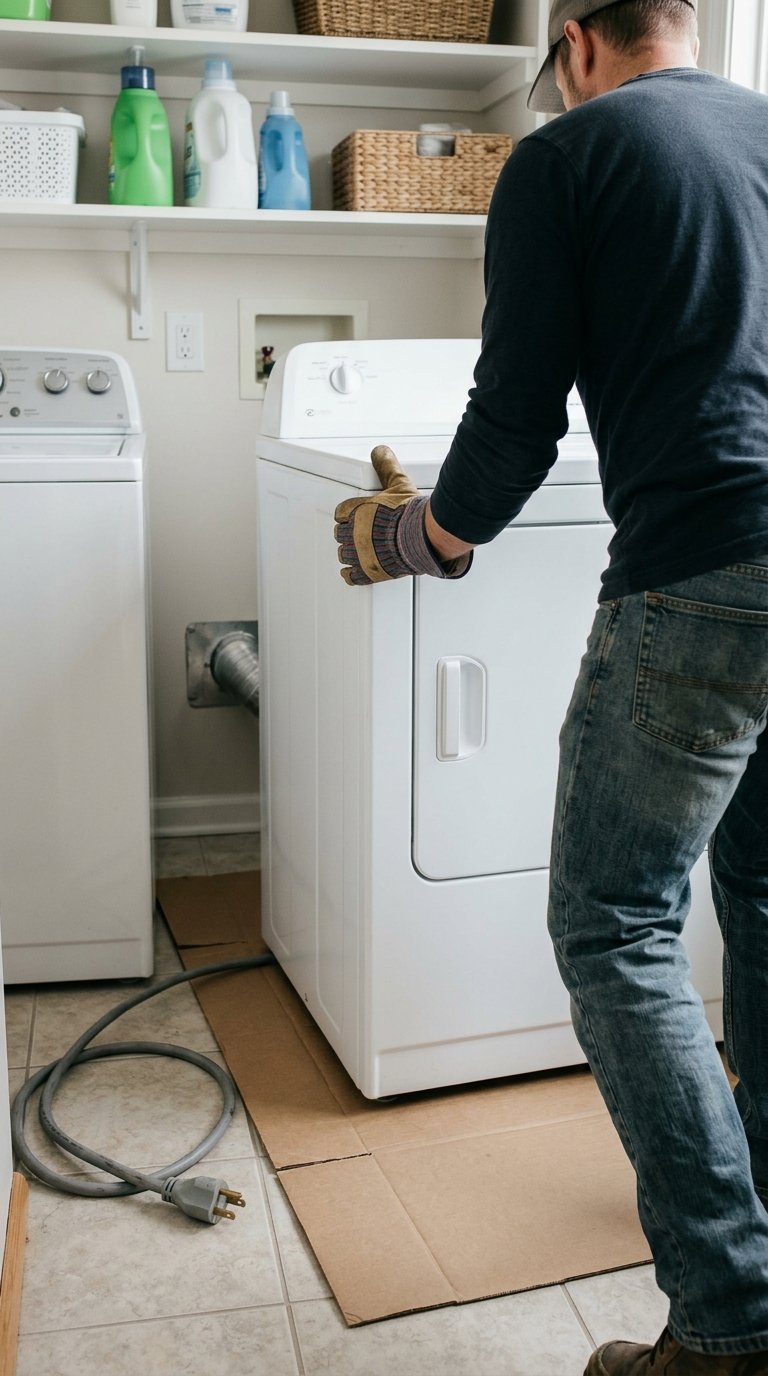
Safety comes first, so start here.
- Unplug the dryer. Pull the plug from the outlet. Do not rely on turning the machine off.
- Check the type. If you have a gas dryer, close the gas shutoff valve. Do not disconnect the gas line unless you are trained. If you are unsure, stop and call a licensed technician.
- Clear the space. Remove baskets, detergent, and anything on top of or near the dryer.
- Pull the dryer forward gently. Move it a few feet from the wall. Go slowly, especially on hardwood or vinyl floors. A piece of cardboard under the feet prevents scratches.
- Look at the old hose. Note how it was routed and where it connects. A quick phone photo helps.
With the dryer out, take five minutes to clean the area. Vacuum the floor, the back of the dryer, and the wall opening. Lint hides in all those spots.
Now disconnect the old hose. Loosen the clamps at both ends and twist the hose free. Check the inside of the wall duct with a flashlight. If you see heavy lint, clean it out before you move on. A new hose will not fix a clogged wall duct.
Step 2: Measure and Cut the Hose
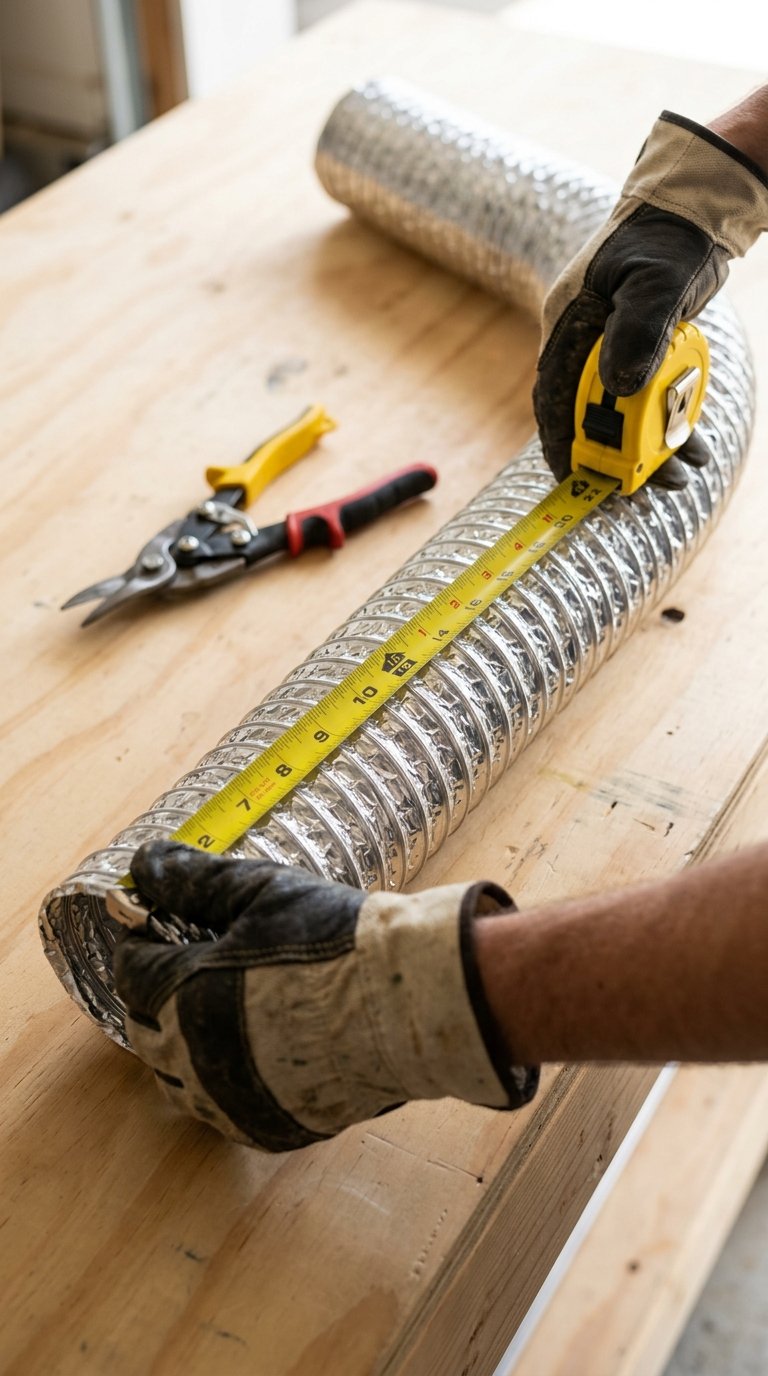
A hose that is too long creates loops where lint settles. A hose that is too short gets stretched, pulled, or pinched.
- Measure the distance from the dryer’s exhaust port to the wall vent opening.
- Add a little slack, about 6 to 12 inches, so you can adjust the dryer without straining the hose.
- Avoid excess. The goal is a straight, short path. Do not coil extra hose behind the dryer.
- Extend the hose to the length you need. Flexible metal duct arrives compressed like an accordion.
- Cut carefully with tin snips if needed. Wear gloves. Cut between ridges for a cleaner edge.
Pro tip: Stretch semi-rigid hose fully before measuring. A compressed hose is much shorter than it looks in the package.
Compare your options for routing:
| Situation | Best Option |
| Dryer sits close to the wall vent | Short semi-rigid hose with a 90° elbow |
| Very tight gap behind the dryer | Periscope-style duct or recessed vent box |
| Long run through a wall or ceiling | Rigid metal duct, with a short flexible piece at the dryer |
| Vent is above or off to one side | Two 45° bends instead of one tight 90° |
Step 3: Attach the Dryer Vent to the Dryer
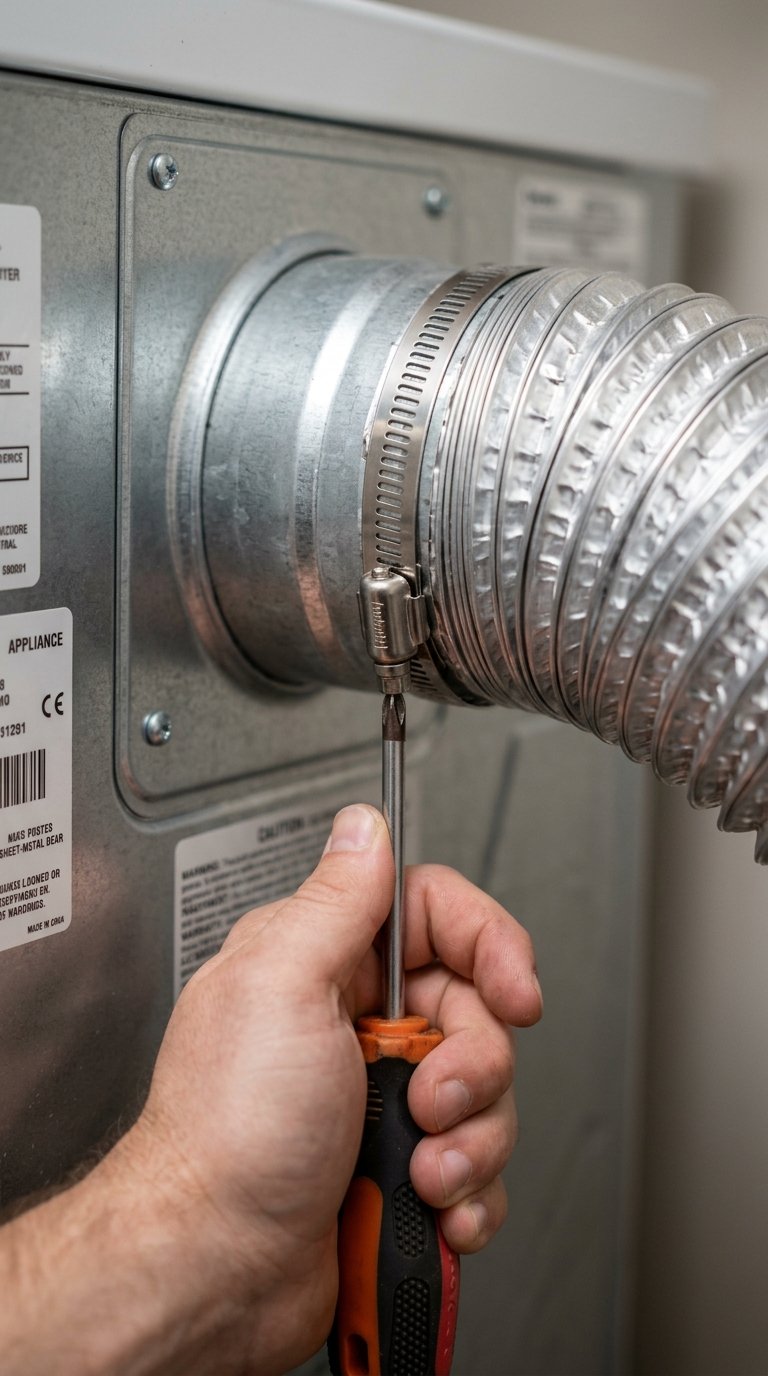
Now connect the hose to the dryer itself.
- Locate the exhaust port. It is a round metal collar on the back of the dryer, usually 4 inches wide.
- Slide the hose over the collar. Push it on at least 1 to 2 inches so it grips firmly.
- Place a clamp over the overlapping section. The clamp should sit on the hose, not past its end.
- Tighten the clamp with a screwdriver until the hose does not twist or slip. Snug is enough. Over-tightening can crush the collar or cut the hose.
- Seal with foil tape if you want extra protection against leaks. Wrap it around the joint, overlapping each layer.
Do not use screws or rivets to hold the hose on. Screw tips inside the duct snag lint and create a blockage point. Clamps and foil tape are the correct choice.
Step 4: Connect the Hose to the Wall Vent
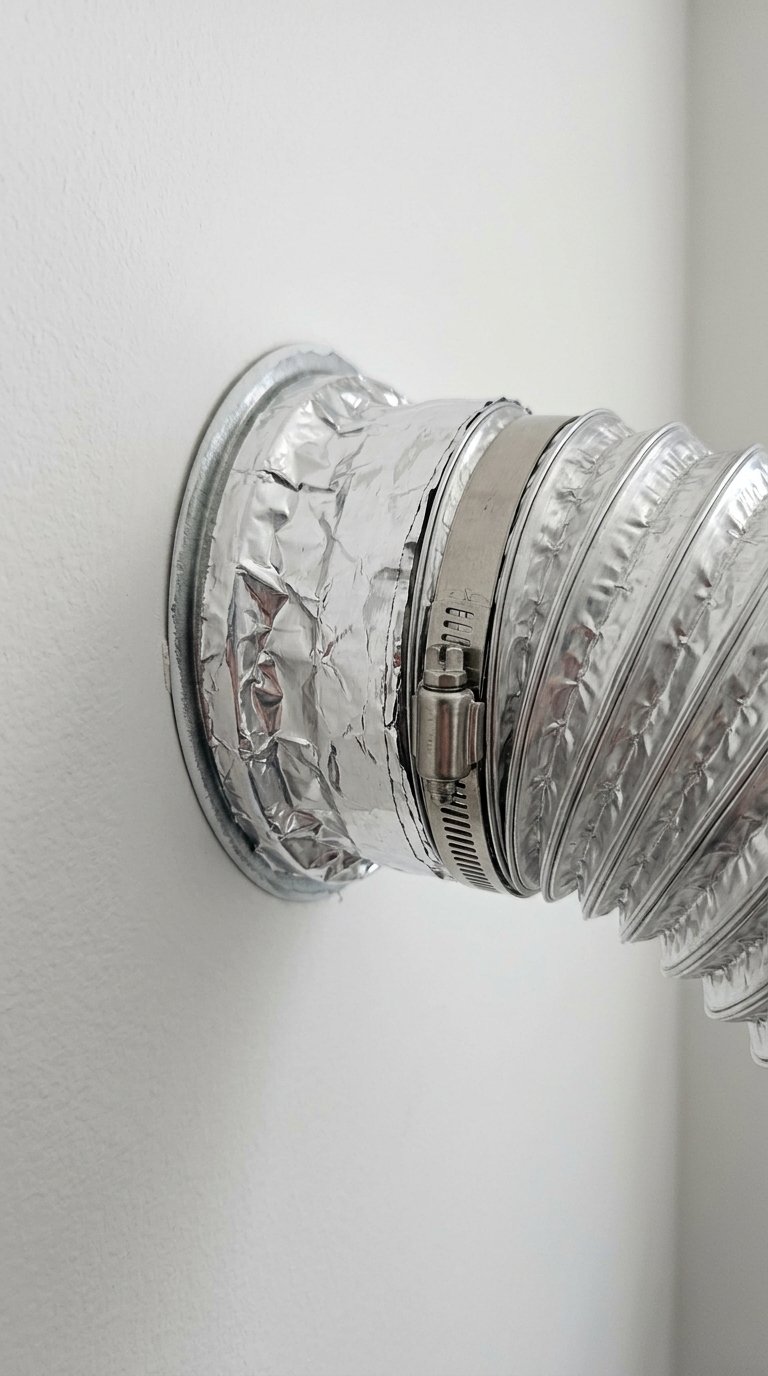
Next, attach the other end.
- Find the wall connection. This is usually a short metal collar, or a duct that runs to the outside of the house.
- Slide the hose over the collar, again overlapping by 1 to 2 inches.
- Direction matters. Make sure the airflow direction keeps the inner joint smooth. The upstream duct (closest to the dryer) should slide inside the downstream one (toward the outside). This way, lint moves with the airflow and does not catch on a seam.
- Install a second clamp and tighten it.
- Wrap the joint with foil tape for a tight seal.
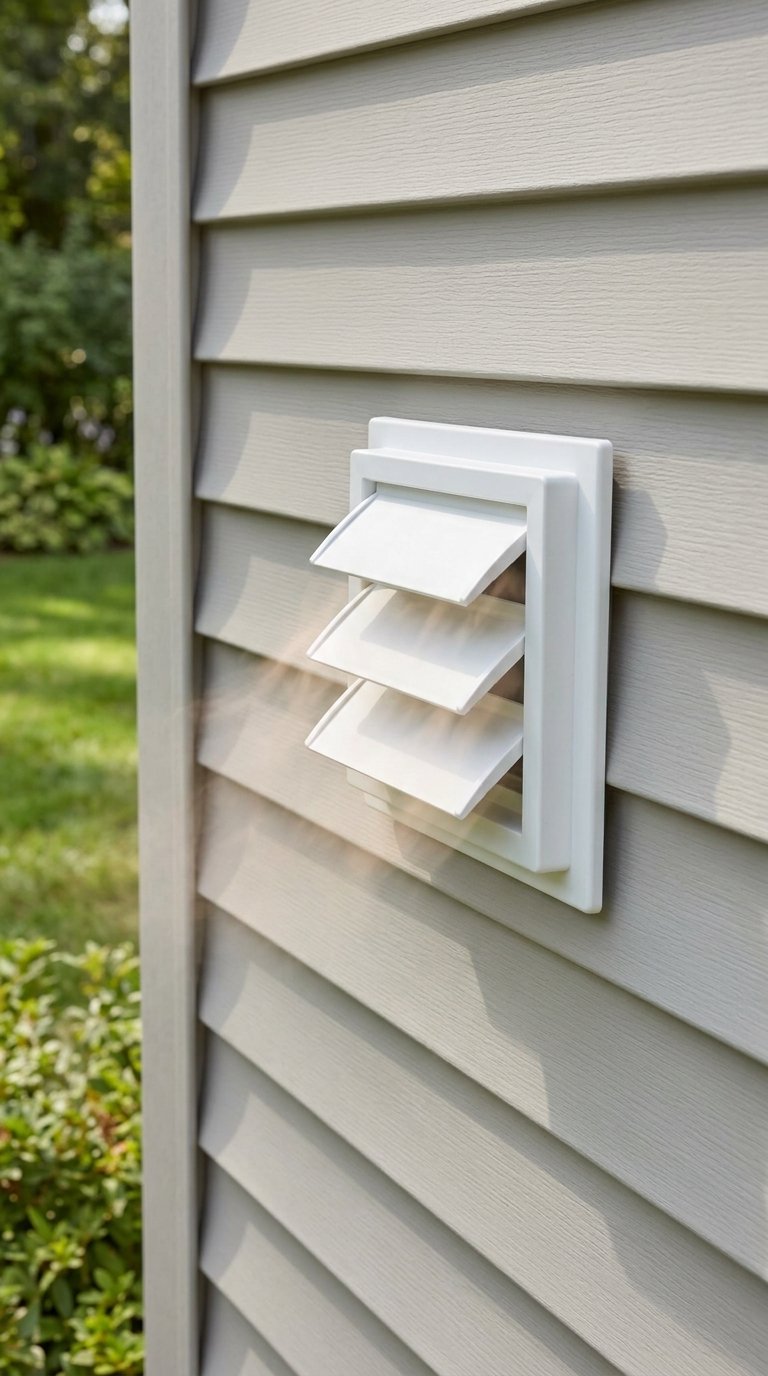
Check the outside vent hood too. Go outside and make sure the flap opens freely. It should not have a mesh screen over it, because lint clogs screens quickly. If the hood is cracked or stuck, replace it now.
Step 5: Secure and Test the Connection
This last step separates a good install from a risky one.
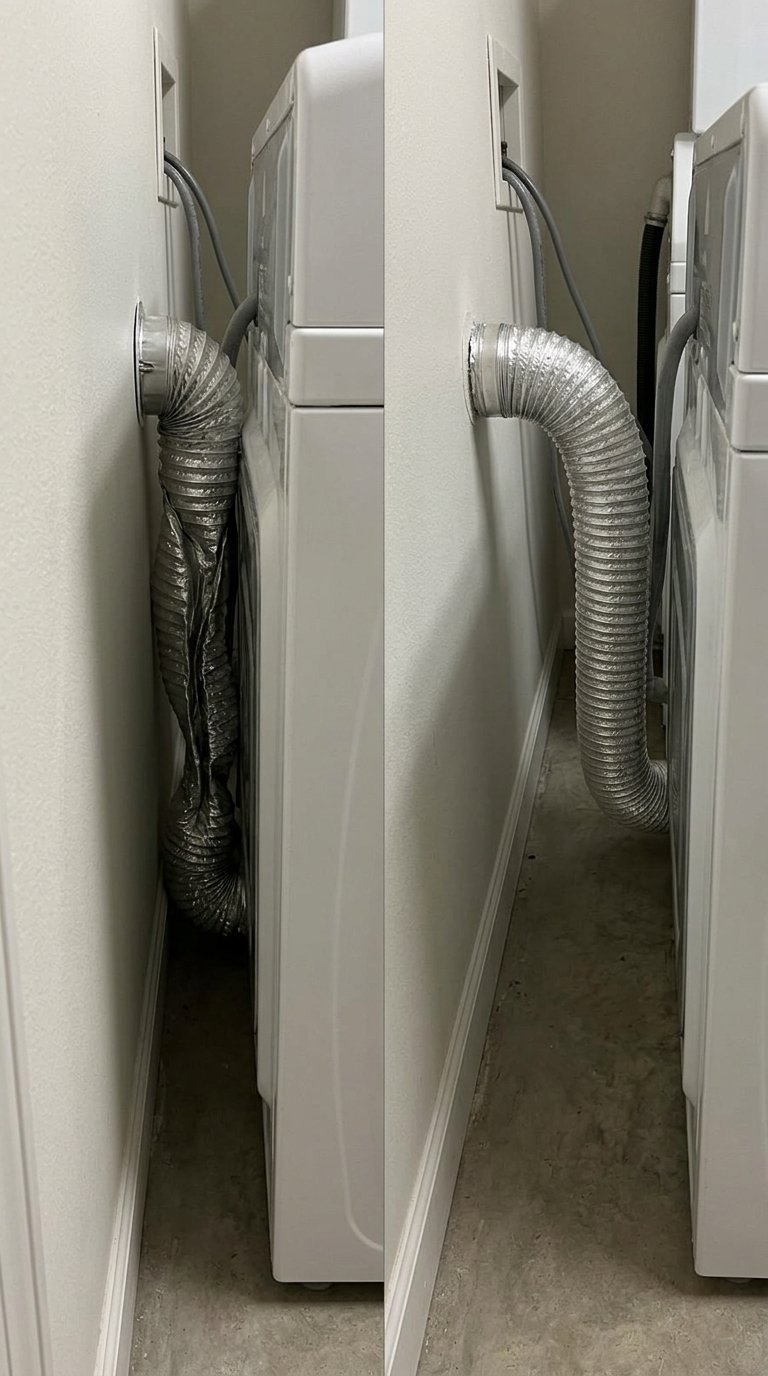
- Slide the dryer back slowly. Watch the hose as you go. It should curve gently, not fold or flatten.
- Leave a few inches of space between the dryer and wall. A hose crushed against the wall loses airflow.
- Level the dryer by adjusting its feet.
- Plug it back in. If it is a gas model, reopen the gas valve.
- Run a test cycle. Use the air-only or low-heat setting for 10 to 15 minutes.
- Check outside. Warm air should push the vent flap open steadily.
- Feel along the hose. Run your hand along each joint. You should not feel hot air leaking.
- Rattling can mean a loose clamp. Whistling can mean a gap.
If airflow looks weak, shut off the dryer and check for a kink, a crushed section, or a blockage in the wall duct.
Quick installation checklist
☐ Dryer unplugged (and gas shut off if applicable)
☐ Old hose removed and wall duct cleaned
☐ New hose is the right size, length, and material
☐ Both ends clamped, no screws used
☐ Joints sealed with foil tape
☐ No kinks, dips, or crushed sections
☐ Outside flap opens freely
☐ Test cycle completed
Common Mistakes to Avoid When Attaching a Dryer Vent to Your Dryer
Even careful DIYers slip up. These are the errors that show up most often, and each one is easy to avoid.
1. Using plastic or thin foil hose
Plastic and thin vinyl hoses can sag, tear, or catch fire. Many codes ban them. Thin foil hose crushes easily and traps lint in its ridges. Choose a metal option.
2. Using the wrong tape
Standard cloth duct tape dries out and peels from heat. Use foil tape rated for ducts instead. Better yet, rely on clamps as the main hold and use tape as a backup seal.
3. Using screws in the duct
Screws poke into the airflow path. Lint wraps around them and builds into a plug. Stick with clamps.
4. Leaving the hose too long
Extra hose means loops, and loops mean lint pockets. Cut the duct to the right length.
5. Crushing the hose behind the dryer
This is the single most common error. When the dryer is pushed flush against the wall, the hose gets pinched. A pinched hose can cut airflow by half or more. Use a recessed vent box or a periscope duct if space is tight.
6. Ignoring the outside vent
You can install a perfect hose and still have problems if the exterior hood is clogged, blocked by snow, or covered with a screen. Inspect the hood every time you work on the vent.
7. Venting into the attic, crawl space, or garage
Never vent a dryer into a space inside the building. The moisture and lint will cause damage and fire hazards. The exhaust must go outside.
8. Joining multiple dryers into one duct
Each dryer needs its own exhaust path. Combining them can cause backdrafting and lint buildup.
9. Skipping the manual
Your dryer manufacturer may have specific limits for hose length, diameter, and type. Ignoring these can void a warranty and reduce performance.
10. Forgetting regular cleaning
Installation is not the end of the job. Even a perfect duct fills with lint over time.
| Maintenance Task | How Often |
| Clean the lint trap | After every load |
| Check that the outside flap opens | Every few months |
| Inspect the hose for damage | Twice a year |
| Deep clean the full duct | At least once a year |
Benefits of Professional Dryer Vent Installation
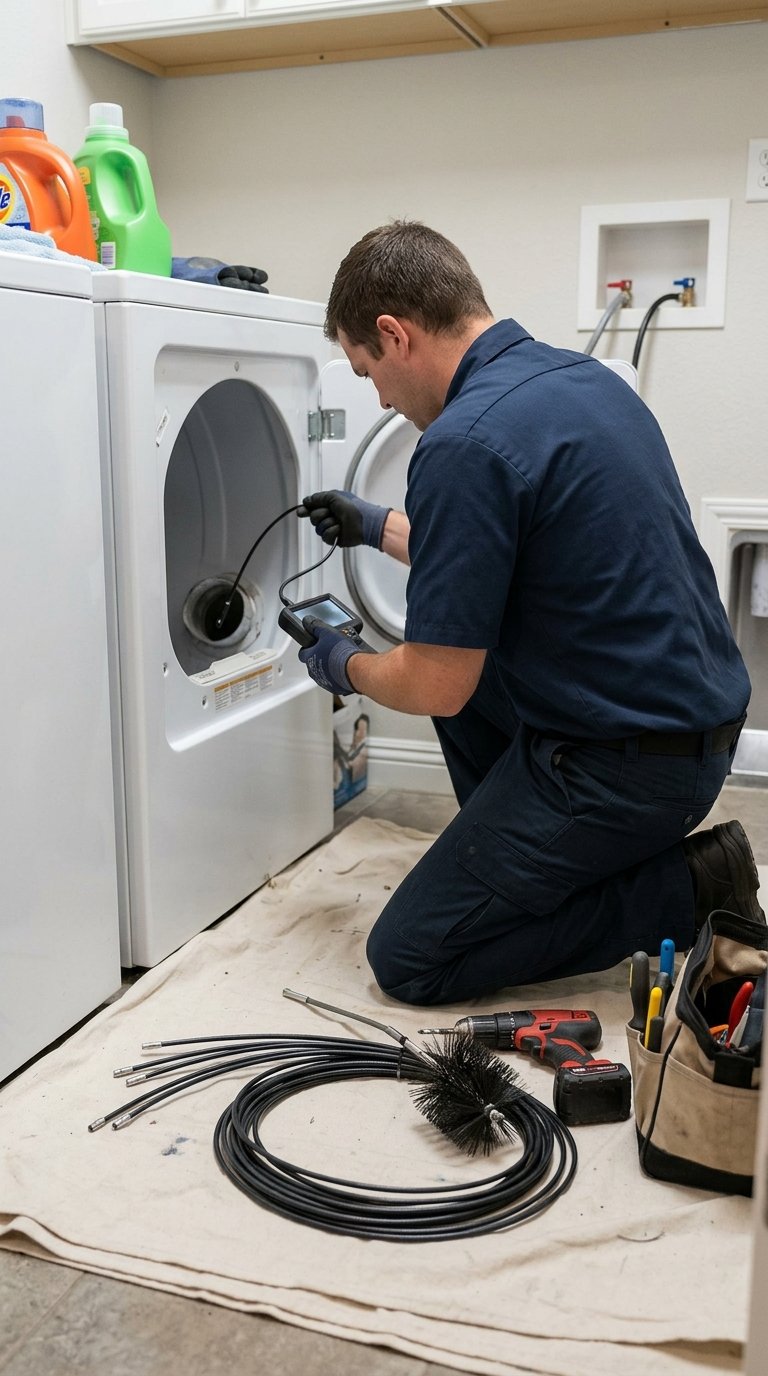
DIY works well for a simple replacement. Some situations, though, call for an expert.
Consider hiring a professional if:
- The duct run is long or has several turns
- The vent passes through a roof, crawl space, or multiple walls
- You have a gas dryer and are unsure about the connection
- You notice scorch marks, a burning smell, or repeated overheating
- Your current setup does not meet local code
- You are renovating and need a new vent line
What a professional brings
- Code knowledge. Installers know the local rules for duct length, material, and termination.
- The right equipment. They use rotary brushes, high-power vacuums, and inspection cameras to find hidden blockages.
- Safety checks. For gas dryers, a trained technician can verify the connection and check for leaks.
- A job that takes you an afternoon may take them an hour.
- Some insurers and landlords ask for proof of vent maintenance. A professional invoice helps.
DIY vs. professional: a quick comparison
| Factor | DIY | Professional |
| Cost | Low (parts only) | Higher (labor plus parts) |
| Time | 30–60 minutes | Often under an hour |
| Skill needed | Basic | None from you |
| Best for | Simple hose swaps | Complex, long, or gas setups |
| Hidden problems found | Sometimes | Usually |
If you hesitate, even a little, getting an expert opinion is a smart move. Fire safety is not the place to cut corners.
Frequently Asked Questions
What size dryer duct hose do I need?
Most U.S. dryers use a 4-inch diameter hose. Check your manual to confirm.
How long can a dryer duct hose be?
Under the IRC, the total exhaust duct is generally limited to 35 feet, minus 5 feet for every 90-degree elbow. The flexible connector should stay as short as possible, often 8 feet or less.
Can I use duct tape on a dryer vent hose?
Use foil tape rated for ducts, not standard cloth duct tape. Clamps should do the main job of holding the hose.
Is a flexible foil hose safe for a dryer?
Thin foil is cheaper but crushes easily and traps lint. Semi-rigid metal is a safer, longer-lasting option.
How often should I replace my dryer duct hose?
Replace it when you see tears, crushing, or heavy lint staining. Many homeowners swap it every few years as a precaution.
How do I know if my dryer vent is clogged?
Long drying times, a hot laundry room, or a burning smell are common signs. Weak airflow at the outside flap is another clue.
Can I install a dryer hose myself?
Yes, a basic hose replacement is a manageable DIY job. For long runs, gas dryers, or code questions, call a professional.
Should the dryer hose be pushed against the wall?
No. A hose squeezed against the wall can kink and block airflow. Leave a few inches of space or use a recessed vent box.
Can I vent my dryer indoors?
No. Dryer exhaust must go outside, because it carries moisture, lint, and heat.
Conclusion
A proper dryer duct hose installation takes less than an hour, costs little, and pays you back every single wash day. Your clothes dry faster. Your energy bill drops. And your home becomes safer.
To recap, pick the right hose type, measure with care, and keep the path short and straight. Use clamps and foil tape instead of screws or cloth tape. Leave breathing room behind the dryer, and always test the finished job.
Then stay on top of upkeep. A quick lint-trap clean after each load and a full duct cleaning once a year will protect your investment.
If your setup feels complicated, or you spot signs of overheating, bring in a professional. A small service fee is a fair price for peace of mind.
Safety note: Always follow your dryer manufacturer’s instructions and your local building codes. Requirements can vary by region.